 Capable Koala
How to Use monday.com as a Risk Register
A risk register is an essential tool for project management, helping teams identify, assess, and manage potential risks.
This guide is intended to be the ultimate guide to managing risk registers using monday.com.
This guide is specifically about how to make risk registers work for monday.com, so it’s assumed you are using monday.com and that you’re familiar with what a risk register is and how to use it.
 Risk register example
Introduction
- Overview of risk management in project contexts
- Benefits of using monday.com for risk management
- Who this guide is for (project managers, risk managers, teams)
Initial Setup
Prerequisites
A paid monday.com account is recommended since you’ll need some of the permission options which we’ll make use of later.
Getting Started
The “Capable Risk Register” app permits systematic and automated calculation of risk values, following your scoring scheme (we’ll show you how to set that up later in the guide). Install the Risk Register app from the monday.com marketplace
Create a new board using the app’s template (The install process will guide you through this)
You should now have a folder containing the getting started guide, along with the risk board and a mitigation board.
Tracking Risks
Adding New Risks
- Click the “New risk” button
- Fill in the risk details:
- Risk description
- Category
- Impact and likelihood scores
- Risk owner
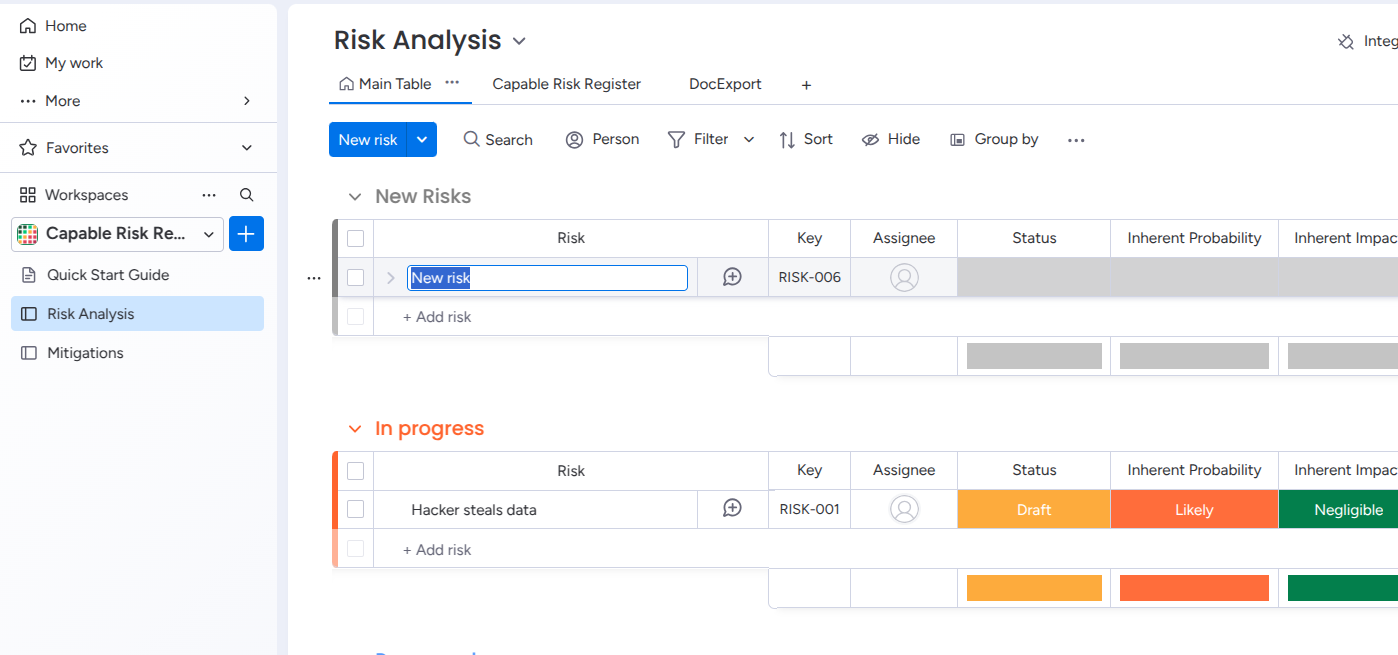 The new risk entry form with all required fields
Risk Assessment
- Use the “Inherent Probability” and “Inherent Impact” fields to set the risk score
- The “Inherent Risk” field will automatically update
Tracking Mitigations
Once risks are identified, it’s crucial to track the actions being taken to address them. The supplied template includes a mitigation section, making it easy to keep track of actions:
Creating Mitigation Tasks
Each risk can have one or more mitigation tasks assigned:
- From your risk item, click “Add mitigation”
- Fill in the mitigation details:
- Description of the action
- Assigned team member
- Due date
- Status
Tracking Progress
Monitor the progress of your mitigation actions:
- Use the status column to track completion
- Set up notifications for status changes
- Link related items or documentation
- Add updates and comments to maintain a clear audit trail
Customizing Your Risk Register
Custom Fields
Adapt the risk register to match your organization’s needs:
- Risk Categories
- Add your own risk categories
- Create subcategories for detailed classification
- Organize risks by department or project area
- Impact Types
- Define custom impact areas
- Set up multiple scoring criteria
- Create organization or regulation specific impact levels
- Likelihood Types
- Define custom likelihood areas
- Set up multiple scoring criteria
- Create organization or regulation specific likelihood levels
For detailed instructions on customization options, visit our customization guide.
Board Views
By default you have the “Main Table” view which shows all board data, and the “Capable Risk Register” view which gives a summary of your risks. Additional views can be created to suit your needs, e.g. summary views
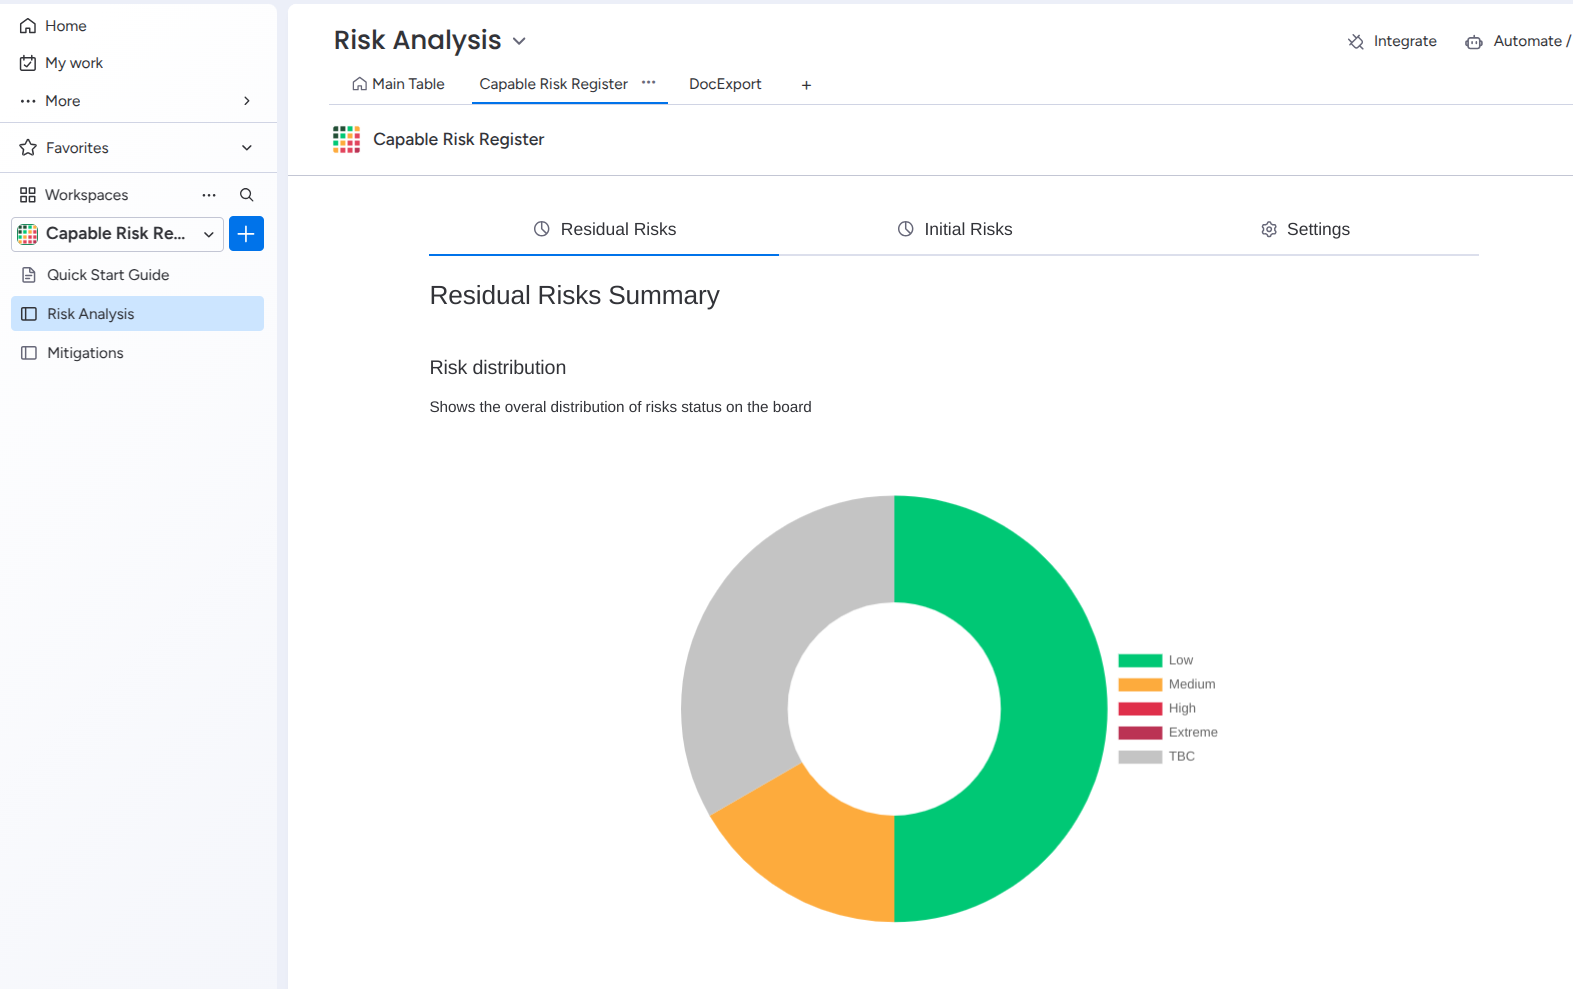 Risk view
Exporting and Reporting
PDF Reports with DocExport
The DocExport app provides a professional way to generate reports from your risk register and is totally free for up to 50 exports per month (at the time of writing):
- Install the DocExport app from the monday.com marketplace
- Download our templates (below) which can be used to generate risk and mitigation reports:
- With DocExport installed, add it to the risks board, and select “Board level” as a starting point
- Upload the risk report template from above
- Follow the remaining DocExport setup instructions and create your first risk report
Templates:
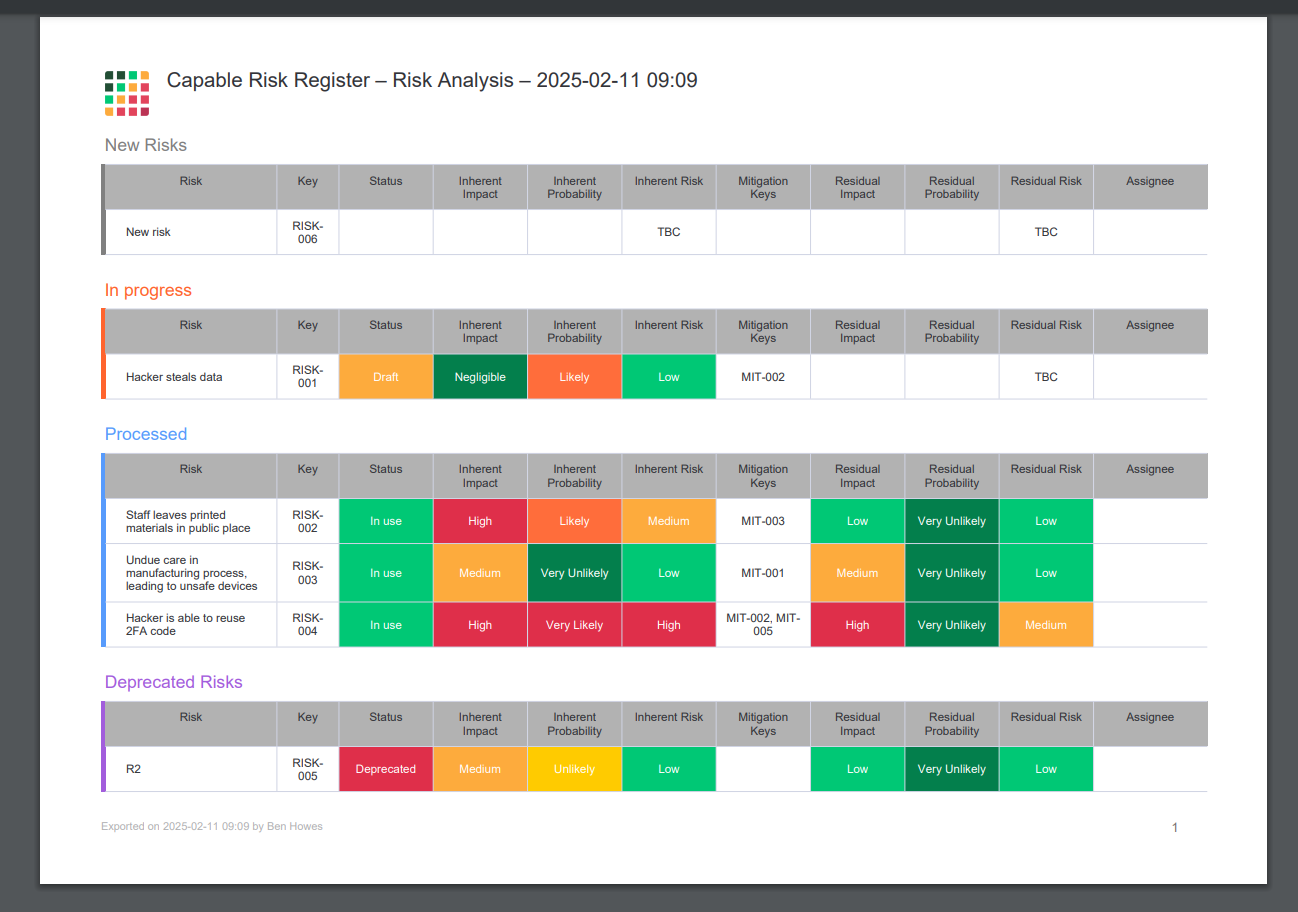 An example of an exported risk report PDF
monday.com Risk Register Best Practices
Permissions Setup
Control access to your risk register:
-
Board Permissions - Restrict edit access to risk managers, or those assigned edit permissions.
-
Select who can view your risk register - Grant view access to stakeholders, or consider column-level permissions for sensitive data.
Both of these settings can be adjusted in the board’s “Permissions” section.
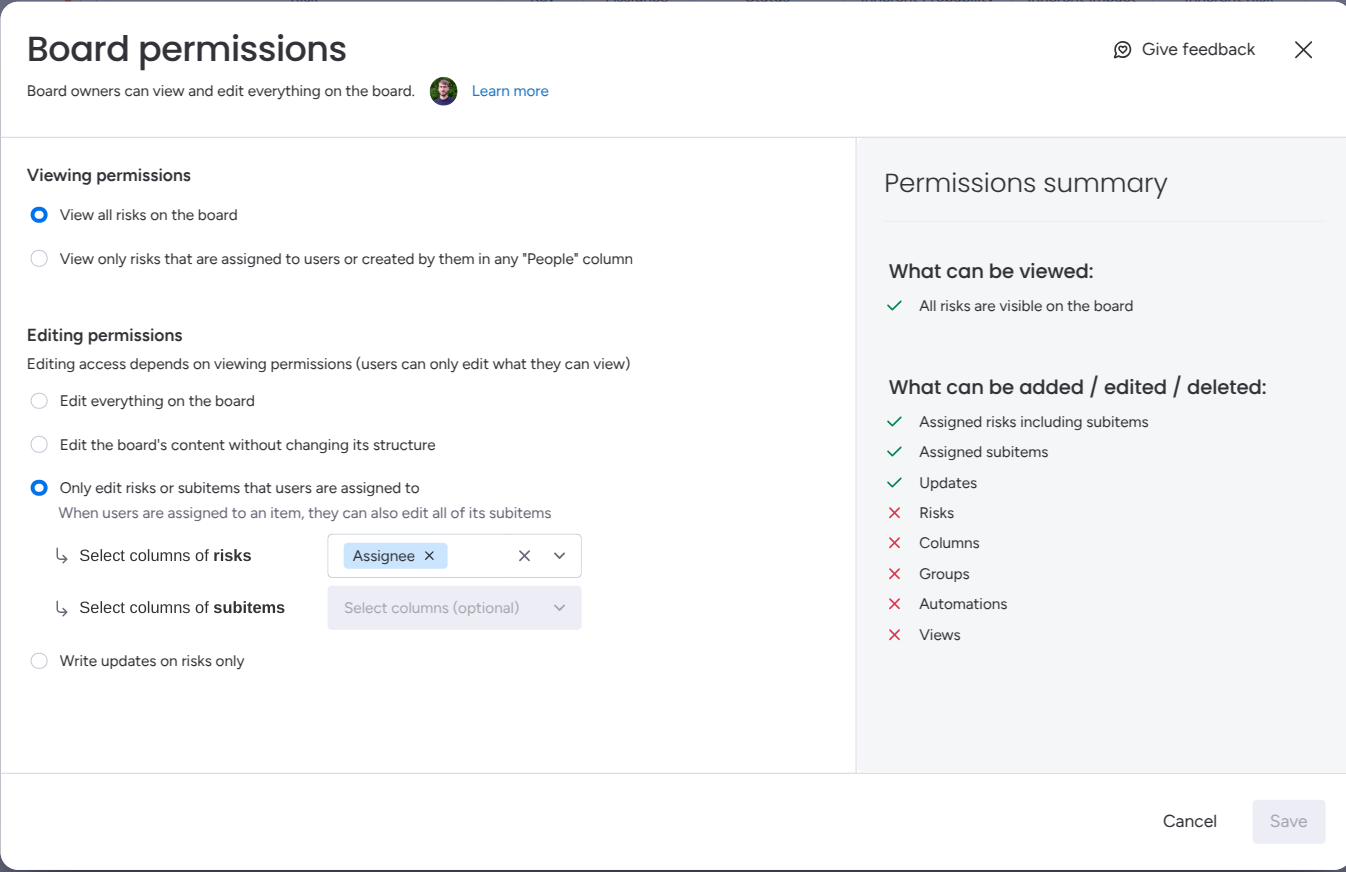 Example permissions
Using Workforms
It’s possible to streamline risk submission using monday.com forms if you wish - you could consider having risks come to a holding board, or directly in to your risk register for triage. This is left as an exercise to the reader.
Tips and Troubleshooting
This is a new guide, so please contact us if you have any questions. We’ll continue to update and improve this guide as we learn more about how people use monday.com and risk registers.