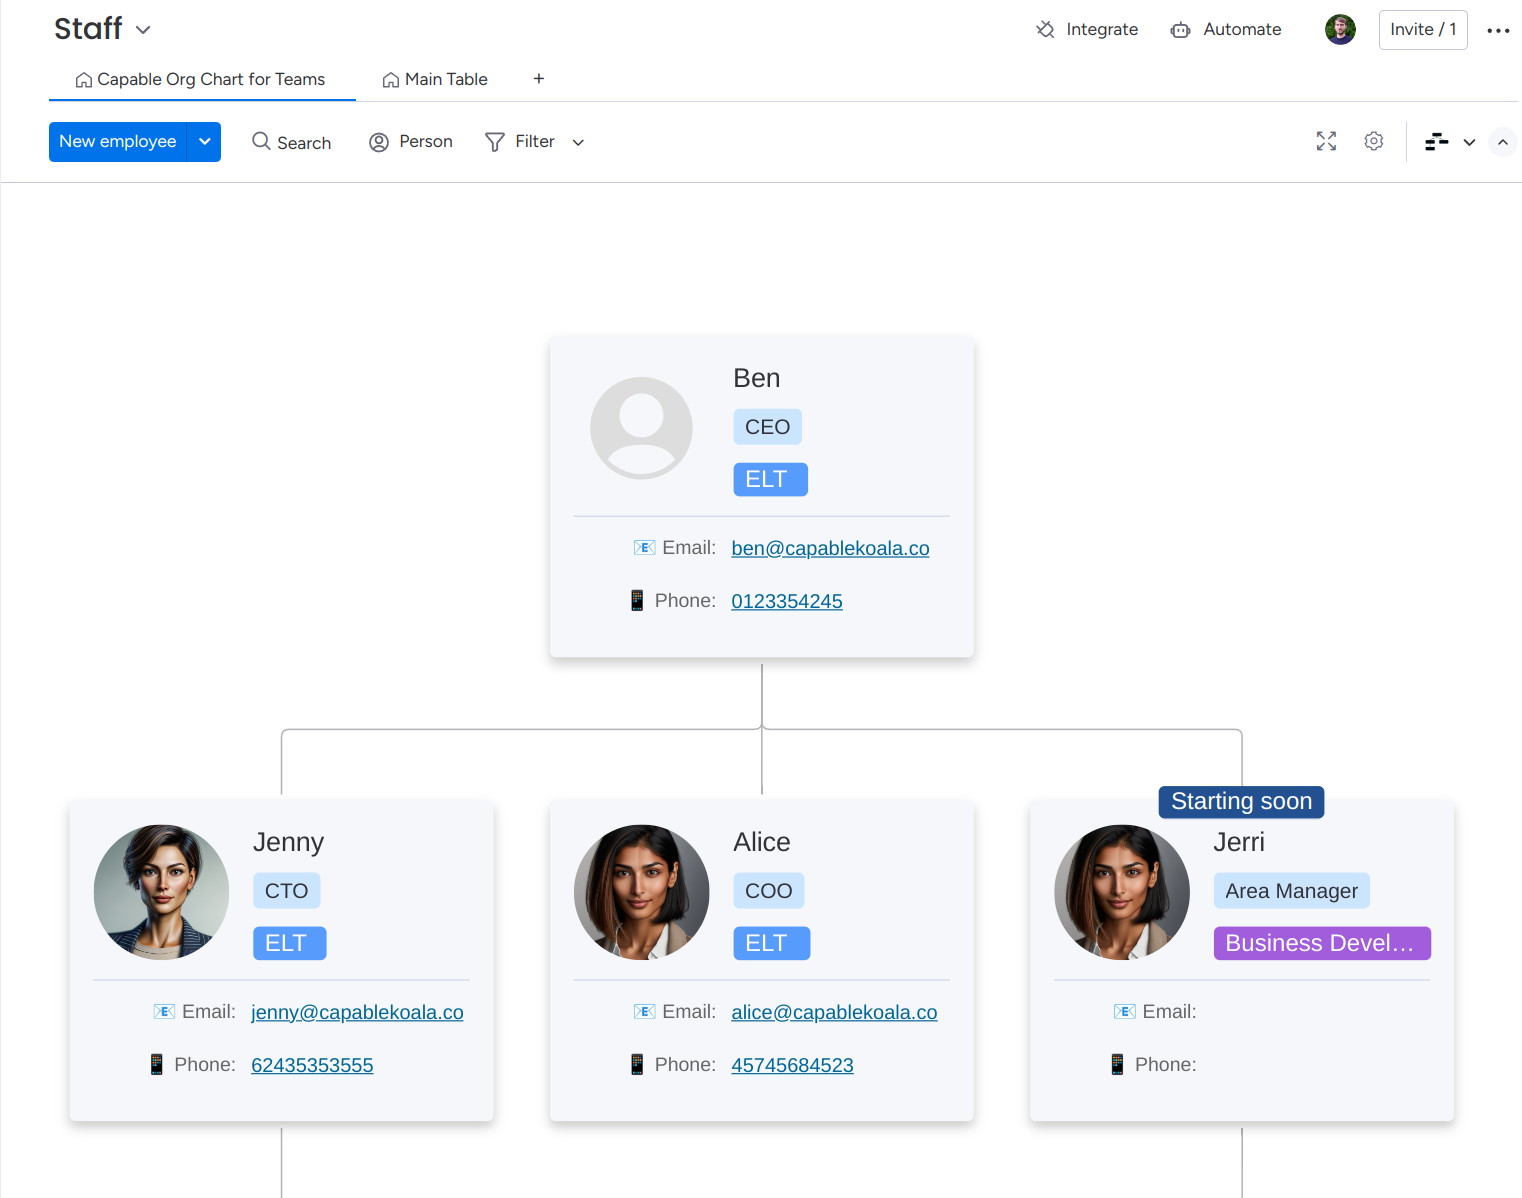
🔍 Visualise, 🧠 Understand, 🗨️ Communicate your team organisation structure with the capable organisation chart for teams.
Set up in just a few clicks and view your organogram however you’d like, then keep it up-to-date with any company changes in a few clicks.
🌟 Key Capabilities
- 🛠️ Great for showcasing your team structure to internal and external stakeholders such as investors, customers, and more
- 🔍 Customisable Column Selection - Enable the display of custom columns in your org chart to showcase specific attributes such as contact information, making it versatile for different viewing needs
- 🗺️ Not limited to just teams - map out departments, subsidiary companies, associations, supply chains, etc
- 🌐 Includes everyone - Create org charts which include both users who have a monday.com account, as well as team members who are not on monday.com
- 🆕 Add placeholders for new roles to show where new hires will fit into the existing team
- 🎨 Great for designing restructures - simply make a private copy of your monday.com board and let your ideas flow
✨ Handy features
- 🔍 Filters down who is shown by any filter criteria you like
- 🏷️ Shows job titles, and the monday.com groups
- ⚡ Updates in real-time as changes are made
- 📊 Exports branded images for use in presentations and documents
⏱️ Get started in seconds: There are just a few simple steps to get going and you’ll be using your org chart in no time at all. Unlike other org chart apps, Capable Org Chart only needs a connect boards column.
👉 Book a demo now: Capable Koala Demo
Installation
If at any point you get stuck, feel free to contact us, we’re here to help! We offer a free “white glove” set up service to make it even easier to get going. Simply Book a demo and we can get you going.
To get started, install the app by clicking add to monday:

The simplest installation at this point is to use our pre-packaged workspace template which contains everything you need to get going.
If however you need to add the org chart to an existing view, proceed to the next section:
Instructions
Show extra columns on contacts with Extra info
If you wish to show some extra columns on the contact card, e.g. for a sub-department, team name, or anything else you may want, it’s possible to select a column from your board to show on the contact, e.g. in the following screenshot, a phone number and email column have been added:
Simply click the gear icon from the bottom left of the chart and then select your column in the panel which opens up.
Export images for presentations etc
Select the download icon from the bottom left of the screen, and you’ll be shown a modal to allow downloading of your org chart.
If Export with header
is turned off, the download will only contain the org chart, but if enabled you can add a logo, title, and the date as a header.
With the header, the top of your export will contain something like:
Show assistants, PAs, EAs etc
You can add assistants (see advanced installation), and get a better view of who is a PA to who:
This feature makes showing assistants a breeze and allows for the same person to be assistant to multiple staff members.
Advanced Installation
1. Required fields
In order for the app to work, a few fields need to be set up correctly.
Note, that where the name for a column is specified, it’s important that you use exactly that name.
1.1. Board set up
If you have a board to track your employees already, which already has a Person
column, you can skip this step.
If not, create a new board to track your employees:
You can name this board however you’d like, and we suggest you select “employees” as the item type you’re managing in this board. You can select anything here though, e.g. “companies” or even just leave it as the default “items”.
1.2 Reports to
This is the only required field for the app to work.
Add a “Connect boards” field to the board containing your staff.
Upon adding the field, click “Select boards”, and select the same board that your are viewing. Click connect boards. You will then be asked about creating a mirror column, simply select “I’ll do it later”.
Rename the field to “Reports to
”, or “Manager
”.
This field now defines your management structure.
1.3 (optional) Role
If you’d like to display job/role titles in the org chart, you can do this by creating a text column called “Role
” or “Title
”.
1.4 (optional, advanced) Avatar
If you wish to display avatars for team members who do not have monday.com accounts, you can do this by creating a file column called “Avatar
” and uploading profile images for the users who are not linked to a user.
1.5 (optional, advanced) Role state
If you want to show tags such as “open role” or other important information about the state of a role, you can do this by creating a Status
column called “Role state
”.
Navigate to customise the column. Any states which you don’t want to show on the org cart should be set as a “item is completed” state, often you’ll want to do this for the grey default label color, or any other states which are used for when the role is ongoing and normal.
When done, your column settings should look like this:
1.6 (optional, advanced) Assistant To
Currently in public beta, things may look odd from time-to-time
If you have assistants, or EAs which you want to show on your org chart, you can add a column with the same configuration as the Reports to
column, but named Assistant to
.
To do so, select the reports to column and duplicate it (without data), then rename it to Assistant to
.
After this, you’ll be able to set up your EAs/PAs and other assistants to show correctly on the org chart.
1.7 All columns
When you’re finished, your board may look something like this:
2. Add board view
Now that your fields are all set up, add the new board view for the org chart visualisation.
- Select the
+
icon - Browse to installed apps
- Select “Capable org chart for teams”
- Click “Open in board”
The following video demonstrates the the process and use: